You’re no doubt familiar with cryptocurrency mining, as proof-of-work coins such as Ethereum and Bitcoin have effectively ruined the GPU market, inflating prices to all-time highs and making it nearly impossible to buy a new graphics card. Earlier this year Chia released, adding hard drives to the list of affected components.
With the recent entry of Raptoreum CPUs may be next, should this coin gain popularity at the same scale as those previously mentioned. In this guide we’ll show you how to easily mine Raptoreum using your CPU.
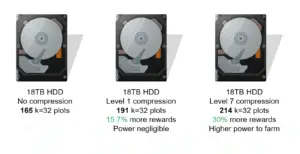
- 4300 H/s GhostRider Hashrate
See Also: How to Stake Raptoreum with iNodez Smartnodes
What is Raptoreum?
Raptoreum (RTM) is a relatively new cryptocurrency that uses the GhostRider algorithm. Like Bitcoin and Ethereum’s algorithms, GhostRider is proof-of-work (POW) so the more hashing power you contribute, the greater your chances of reaping rewards (or if you’re in a mining pool, the more rewards you’ll gain if your pool wins the block).
See Also: The Best CPU, Motherboard, and More for Raptoreum Mining
Unlike its more mainstream counterparts, Raptoreum can only currently be mined with a CPU, whereas Ethereum and Bitcoin are GPU-mined. This means that you can technically mine both at the same time, as they use entirely different pieces of your system.
How to Mine Raptoreum
Mining Raptoreum is relatively easy. To do so, just follow these instructions:
Download the Wallet
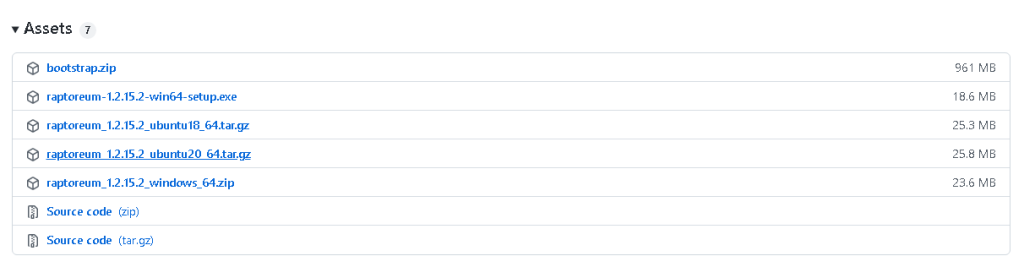
Go to Raptoreum’s GitHub repository and, under “Assets,” select the option that’s compatible with your operating system. Since we’re using Windows in this example, we’ll select raptoreum-1.2.15.2-win64-setup.exe.
It will automatically begin downloading. When the download is finished, open the setup file and follow the prompts of the installation wizard.
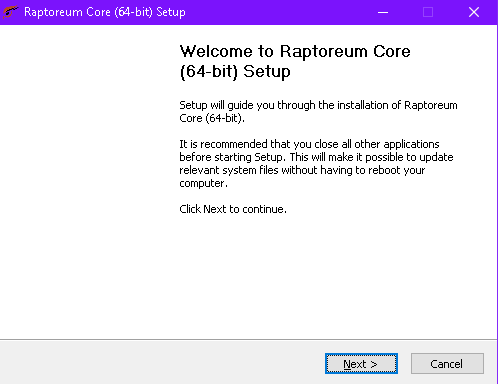
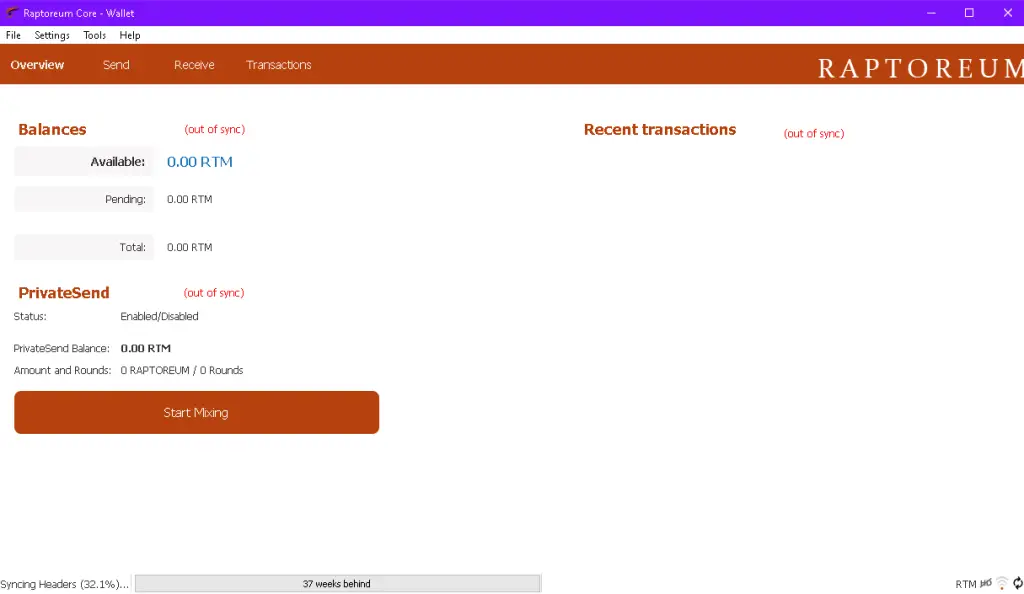
Once installation is complete, open the Raptoreum wallet if it doesn’t do so automatically. At this point you’ll have to wait for the wallet to synchronize with the Raptoreum network; it has to sync with data all the way back through February 26, 2021. In the meantime you can proceed with the next steps.
See Also: How to Mine Cryptocurrency: The Essential Guide
Find Your Key
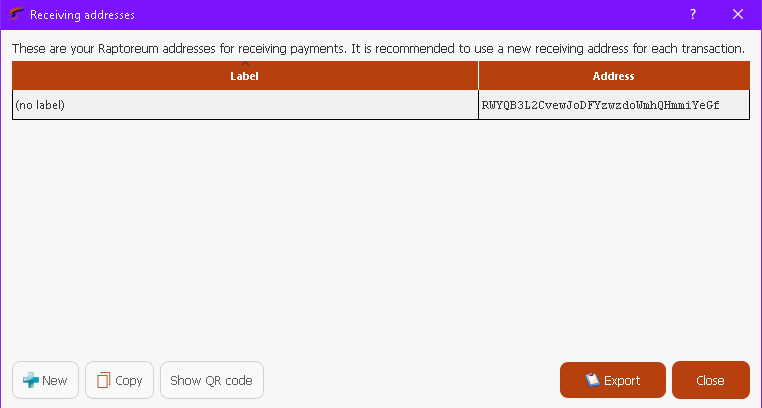
From the Raptoreum Wallet, select File>Receiving Address>Copy. Your key is now stored in your clipboard. You’ll need it in a minute to set up the miner.
Install the Mining Client
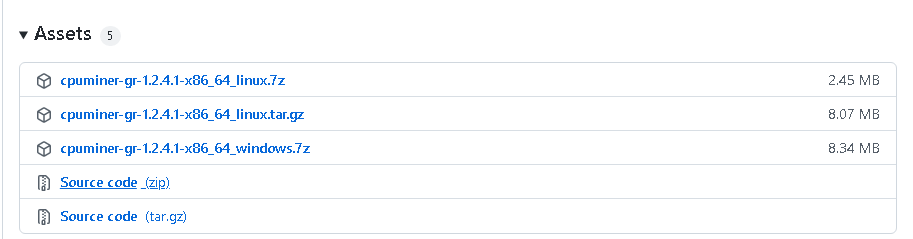
If you want to pool mine (which is highly recommended, as this will almost certainly increase your profitability), you’ll need to install a miner. We recommend CPUminer-gr, as it’s recommended by most mining pools and Raptoreum’s official site.
From the linked GitHub repository, download and run the appropriate file for your OS, found in the “Assets” dropdown.
If you get an error when trying to download on Google Chrome, you may have to temporarily enable No Protection mode. CPUminer-gr is a reputable software, and is simply flagged because Chrome is unfamiliar with it.
To switch, go to Chrome Settings>Privacy and Security>Security and select No Protection under Safe Browsing. As soon as CPUminer is downloaded you can switch back to Standard Protection.
Once downloaded, open the .zip file and move the cpuminer folder to your desktop or another memorable location.
Configure the Mining Client
Once the client is installed, you still need to configure it so that it’s mining to the correct wallet address, pool, and region.
We highly recommend Flockpool, as it accounts for over half of Raptoreum’s total hashrate and will consequently give you the most consistent profits. If you’d like to opt for a different pool for any reason you can view an up-to-date list of Raptoreum mining pools here.
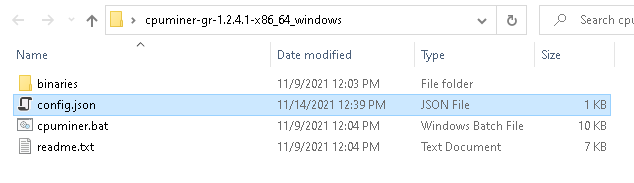
Once in the cpuminer folder, open the config.json file with Notepad or your preferred text editor. If you’re using Flockpool, delete all text and replace it with this code:
{
  "url": "stratum+tcps://<Your Region>:<Your Port>",
  "url-backup": "stratum+tcps://<Your Backup Region URL>:<Your Port>",
  "user": "<Your Wallet Address>.<Worker Name>",
  "pass": "<Your Password>",
  "algo": "gr"
}
Your region should be whichever has the lowest ping, and the backup should be the second lowest. We recommend using SSL (5555) as your port. Your wallet address is the same one you copied earlier, and your worker name can be whatever you want; it’s the identifier for the specific machine you’re mining on.
Lastly, the password is used when you want to cash out, so set it to something that’s difficult to guess.
When completed it should look something like this:
{
  "url": "stratum+tcps://us.flockpool.com:5555",
  "url-backup": "stratum+tcps://us-west.flockpool.com:5555",
  "user": "RWYQB3L2CvewJoDFYzwzdoWmhQHmmiYeGf.MainPC",
  "pass": "password",
  "algo": "gr"
}
Alternatively, you can use Flockpool’s Start Mining tool to auto-configure your config.json file. If you do this, just delete the original config.json and fill out all parameters on Flockpool’s page. Once that’s complete download the newly created config file and move it to your cpuminer folder.
Start Mining
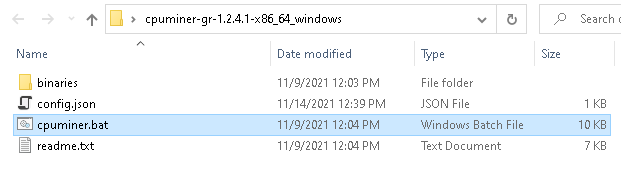
Once your config file is correctly configured, all that’s left to do is mine. Double click cpuminer.bat and your command line will open and begin mining. You’ll see a screen like the one shown below that says Testing. This optimizes your system to provide the best hashrate and profitability. This should take about 2.5 hours. Once it’s done, a tune_config file will be saved to your miner folder with the optimal settings and you won’t have to repeat this process.
If you’d prefer to get straight into mining without the optimization, simply add this line to your config file code, inside the curly brackets:
"no-tune":trueTo view your profits simply go to your mining pool’s site and enter your wallet address. You’ll see your statistics and can cash out from here, usually after reaching a minimum threshold or time period. Keep in mind that if your system is tuning, you won’t see that rig on the mining pool until this process is complete. Even if you skip tuning, it may still take up to 20 minutes for your worker to show up.
Adding More Workers
If you have multiple mining rigs, it’s easy to start mining with these. The easiest method is to copy the folder containing your config.json and cpuminer.bat files to a portable storage drive. Move this folder to any computers with which you want to mine Raptoreum. Simply change the worker name in the config file and start up the .bat file and you’re ready to go.
If you don’t have a portable drive you can follow the same process detailed above on the new computer.
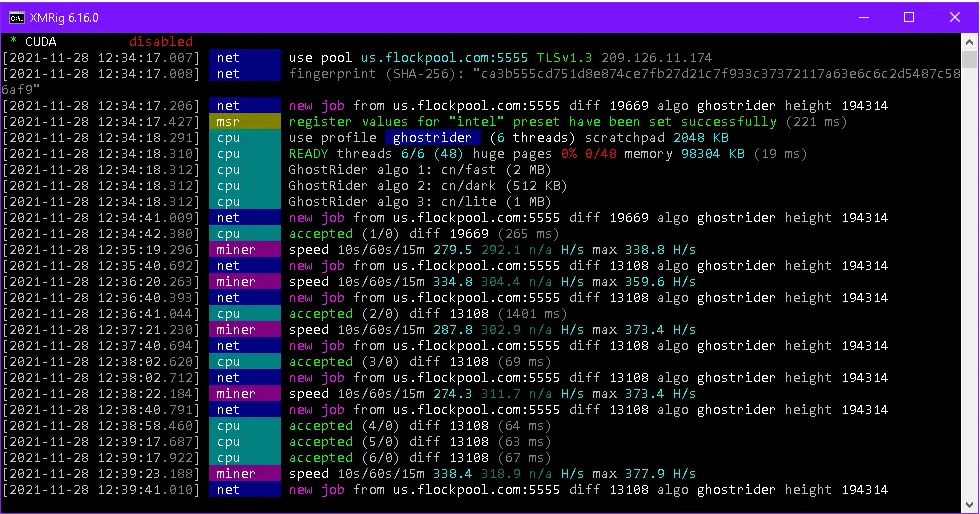
How to Mine Raptoreum with XM-Rig
A couple of days ago XM-Rig, one of the best CPU mining clients, added support for the GhostRider algorithm. What this means for Raptoreum miners is higher mining hashrates without changing hardware. Preliminary tests seem to indicate a hashrate improvement of up to 16% depending on the processor’s model. On average CPUs are roughly 5% faster using this software, and the fee is only 1% versus CPU-Miner’s 1.5%. Unlike CPU-Miner tuning isn’t required, so you can start mining right away.
Begin by downloading and setting up the Raptoreum Wallet as detailed in the instructions above, and then continue on to the next steps.
Download XMRig
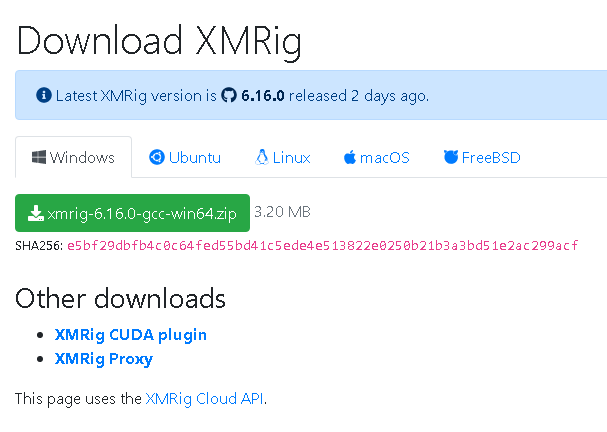
If you’re on any non-Windows OS head over to XMRig’s download page. Select your OS (all major operating systems are supported) and download the .zip file. For Windows we recommend xmrig-6.xx.x-msvc.win64.zip as it is reportedly more efficient than the gcc variant. You can find this in XMRig’s GitHub repository, or you can simply download the standard version from the download page.
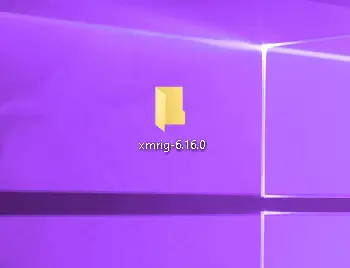
Once the .zip file is downloaded, open it up. You may need to install WinRar or a similar software to do so.
Drag the folder labeled xmrig-6.xx.x to a memorable and easily accessible location such as your desktop.
Edit Config File
Locate the file named config.json and open it with a text editor like Notepad. Delete the contents and replace them with the following code:
{
    "autosave": true,
    "cpu": true,
    "opencl": false,
    "cuda": false,
    "pools": [
        {
            "coin": null,
            "algo": "ghostrider",
            "url": "us.flockpool.com:5555",
            "user": "RWYQB3L2CvewJoDFYzwzdoWmhQHmmiYeGf",
            "pass": "password",
            "tls": true,
            "keepalive": false,
            "nicehash": false
        }
    ]
}
Replace the pool URL and port with your own; you may also want to adjust the server to the closest one even if you’re using Flockpool. Change the “user” address to your own wallet address, and “password” to your own. Everything else can remain unchanged. When you’re finished save the file.
Edit CMD File
Next, edit rtm_ghostrider_example.cmd. Once again, delete the file’s contents and replace it with this code:
cd %~dp0
xmrig.exe -a gr -o us.flockpool.com:5555 --tls -u RWYQB3L2CvewJoDFYzwzdoWmhQHmmiYeGf -p password
pause
Adjust the pool URL, port, wallet address, and password to your own and save the file.
Run as Administrator
It’s massively important that you run the miner as an administrator. Otherwise you’ll get the following message:
FAILED TO APPLY MSR MOD, HASHRATE WILL BE LOWAs stated, your hashrate will be significantly lower. To run as administrator, simply right-click on rtm_ghostrider_example.cmd and select Run as Administrator. Select Yes in the window that pops up and XMRig will begin mining.
That’s all there is to it. Enjoy your (hopefully) higher hashrates.
How to Solo Mine Raptoreum
Truth be told, we don’t recommend solo mining Raptoreum. For the majority of miners it will be far less profitable. In fact, unless you have an absolutely massive operation running you probably won’t win any blocks, so your revenues are likely to be zero. Still, if you’d like to try your hand at solo mining RTM in the hopes of hitting the jackpot, here’s how to do it.
Download and Synchronize Raptoreum Core Wallet
Download Raptoreum Core, Raptoreum’s official wallet. Once it’s installed you’ll have to wait for your computer to synchronize with the Raptoreum blockchain, which could take several hours.
Begin Mining to Your Wallet
Once you’re completely up-to-date navigate to Tools>Debug Console in Raptoreum Core. You’ll see an interface like the one shown below.
Type the following code:
setgenerate true <CPU core count>So if you have a Ryzen 9 5950X (a 16-core processor) you’d type:
setgenerate true 16If, for some reason, you don’t want to utilize all cores you can enter a value less than your total core count. This will naturally decrease your hashrate. If you want to pause mining enter the following into the console:
setgenerate falseAny RTM that’s mined will be automatically deposited in your wallet.
How to Sell Raptoreum
There’s no shame in taking profits as soon as you can. While this limits your upside, selling mined RTM quickly is the best way to guarantee revenues.
If you want to sell your Raptoreum the best way to do so is through a centralized exchange with support for the currency. CoinEx is the largest Raptoreum CEX, accounting for about 55% of the total trading volume, so we’d recommend it for anyone looking to offload their accumulated RTM.
Before you sell any Raptoreum you’ll have to create a CoinEx account. Once the process is complete navigate to Assets > Deposit. You may have to complete 2-factor authentication before proceeding with the deposit.
Once 2FA is complete return to the Deposit page and make sure the currency is set to Raptoreum, as shown in the image above. You’ll be assigned an address, which you should copy.
With the deposit address copied, open up Raptoreum Core (your RTM wallet) and allow it to sync if needed. In the Send tab paste the CoinEx deposit address under Pay To: and specify the desired amount.
Click Send and your funds will be on their way. It may take up to 20 network confirmations (40 minutes) before funds are available for trade, although it typically won’t take this long.
With an RTM balance in your CoinEx wallet open the Exchange. CoinEx supports two RTM trading pairs: RTM/USDT and RTM/BTC. We recommend RTM/USDT since your crypto will be converted into a non-volatile stablecoin. Sell all of your balance for Tether and the funds will be available in your CoinEx wallet.
Lastly, go to Assets > Withdraw. Select USDT and your balance will show up. It’s of critical importance that you make sure the correct chain is selected; ERC20 for Coinbase or BSC for Binance and Crypto.com. The Binance Smart Chain is highly preferable since the transaction fee is 1.1 USDT instead of the 49 USDT demanded for Ethereum network transfers.
Input your Coinbase/Binance/Crypto.com address and specify the amount to be transferred, then click Submit. The USDT will then be sent to your CEX wallet where it can be converted to fiat and withdrawn.
Staking Raptoreum in Nodes
If you’d prefer to turn your Raptoreum into a potential passive income source you may prefer staking over selling. Staking RTM isn’t too difficult but it’s involved enough that we created a separate guide covering it. You can find our guide to staking RTM with iNodez here.
What CPUs are Best for Raptoreum Mining?
Processors with the highest hashrates are those with large L3 caches and high core-count. This means Ryzen CPUs, especially high-end ones, tend to be better than their Intel counterparts, as they generally have higher-capacity L3 caches.
The Ryzen 9 3900X, Ryzen 9 3900XT, Ryzen 9 5900X, and Ryzen 9 5950X are the best processors for Raptoreum mining, but if you already have a CPU there’s no reason not to use it. You can view the GhostRider hashrates for many popular Intel and AMD processors here.
How Profitable is Raptoreum Mining?
Raptoreum mining profits are highly dependent on the price of the asset when you sell. If you hold your mined coins in the hopes that RTM significantly appreciates, you could make much more than if you sold. On the other hand, if the price tanks you could be left with a relatively worthless currency.
At the time of writing, most modern CPUs with 6 or more cores can generate profits of over $1 a day, up to an estimated $3.75 daily with a Ryzen 9 5950X. However, as previously mentioned, profits are largely tied to Raptoreum’s price and network difficulty.
At the end of the day, we think it’s worth mining if you already have a computer. Aside from a bit of electricity, there’s not much to lose. Mining at a large scale obviously presents far greater risk, and we suggest avoiding doing so unless you’re extremely confident in RTM’s long-term potential.
Raptoreum Block Rewards
According to Raptoreum’s Litepaper, rewards per block mined will be 5,000 RTM through a block height of at least 552,812. 3,750 of this will go to the miner, while the rest is distributed to the developer and to other features such as the dynamic checkpoint award, assets/futures reward, and smart node collateral.
Can Raptoreum be GPU Mined?
Raptoreum can, in fact, be mined with a GPU. If you want to do this you’ll need to install WildRig Multi, unzip the file, and save it to a memorable location.
Now open the file named start-raptoreum.bat in Notepad or another text editor. Erase the line under :loop and paste the following code. Note that you’ll need to substitute the appropriate URL, region, wallet address, worker name, and password.
wildrig.exe --print-full --algo ghostrider --url stratum+tcp://<Your Region>:<Your Port>--user <Your Wallet Address>.<Worker Name>--pass <Your Password>While Raptoreum can be GPU mined, as of the time of writing it’s not the most profitable GPU-mineable crypto. If you want to mine with your graphics card we recommend mining Ethereum. Check out our guide to mining Ethereum to learn more.
Art of PC is reader-supported. If you make a purchase through our affiliate links we may earn a commission. Thanks for your support!