What is Super Zero?
Super Zero is a platform that debuted in July 2019 devoted to delivering the best possible transactional privacy. Its native token, SERO, is GPU-mineable much like Ethereum and uses the ProgPow algorithm. There’s only one downside; mining SERO is only around 65% as profitable as mining Ethereum. At the time of writing a non-LHR RTX 3080 can generate about $5.34 in profit per day, while mining SERO only returns around $3.44 every 24 hours. If that’s the case, why would you even consider mining Super Zero?
The main reason is high upside; SERO has a lot of headroom to expand while Ethereum has considerably less. Super Zero’s market cap is less than $35 million at the moment, mere pennies in the realm of crypto. Compare this to Ethereum’s cap of roughly 465 billion, a whopping 13,000 times larger. For Ethereum to double in value it would have to reach a market cap of nearly a trillion. Meanwhile, SERO could double without breaking nine-figures. In other words, it’s a lot easier to grow with a small market cap and SERO’s is considerably smaller.
To be clear, if you choose to mine Super Zero it should be with the intent to hold in the hopes of a price appreciation. This isn’t a foreign concept in crypto mining; mining and holding can lead to massive returns as compared to selling immediately. For instance, we mined about 0.7 ETH over the course of this past year. We regrettably sold most of this along the way, beginning when ETH was worth around $1,400. If we had held this Ethereum it would presently be worth around $4,000.
See Also: The Best Cryptocurrencies to Mine
In the same way, Super Zero may appreciate (and simply based on market cap it has far more room than ETH to grow by large multiples). If you hold it for a longer time frame it’s not unlikely that it could be more profitable than mining Ethereum. If your estimated SERO-mining profits are currently $3 a day and the price increased six-fold, your effective profits would be $18 a day.
Naturally this approach is more speculative than instantly selling mined assets since the price can decrease just as easily as it can increase. For this reason we don’t recommend purchasing hardware for the express purpose of mining. If you already have the equipment, though, it might as well be put to use to earn its keep.
Another compelling reason to consider mining SERO is its wider range of supported GPUs. While Ethereum’s DAG size is over 4GB (meaning you can’t use cards with 4GB or less of VRAM like the GTX 1650), Super Zero can be mined with GPUs of all calibers.
Before you consider mining we highly recommend reading Super Zero’s whitepaper. It outlines the project’s goals and the problems it seeks to solve. If, after reading this, you believe it has a unique use case or does its job better than alternatives, it wouldn’t be unreasonable to believe the price of SERO will appreciate in the long-term.
See Also: How to Mine Cryptocurrency: The Essential Guide
- ~60MH/s Ethash
- ~61 H/s ZelHash
- ~28 MH/s ProgPow
How to Pool Mine SERO
Mining SERO is extremely simple; all you’ll need is mining software, a pool, and a GPU. If you have a graphics card the hardest work is already done.
Download SERO Wallet
Before you begin mining you’ll need a wallet address to which you can send your earnings. Navigate to Super Zero’s GitHub repository and select the version specific to your OS. Since we’re on Windows we downloaded SERO-Wallet-installer-0-1-7-MAINNET-RELEASE.exe.

Once the wallet installer is downloaded run it and follow the installation wizard’s prompts. Once the installation is complete, run the wallet software. You’ll need to allow the node to synchronize with the mainnet before you can see any SERO balance you’ve accrued, and this may take a while (around a day in some cases). You can still mine in the meantime, you just can’t send or receive SERO. If you’re mining to hold for the long-term this won’t be an issue.
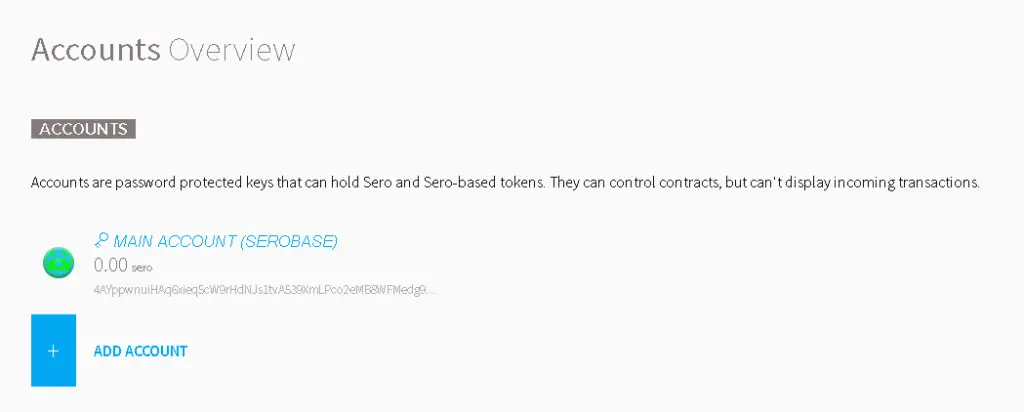
Create a Wallet Account
You’ll need to create an account (wallet key) before you can mine. Select Add Account and follow the prompts. Once you complete this step you’ll be assigned a wallet address and you’ll be able to begin mining.
Download Mining Software
To mine cryptocurrency you need a specialized software. We recommend T-Rex, and the following steps will be specific to this software. It is a reputable software with a competitive 1% fee (essentially 1% of your total hashrate mines for the developer). You can find T-Rex’s GitHub repo through this link.
Once again, select the make that’s compatible with your OS and download the zip file. Once the file is downloaded create a folder on your desktop (or elsewhere if preferred) and move all of the contained files into this folder.
Configure and Run Your .bat File
Finally, it’s time to configure the batch file. We recommend editing the file labeled SERO-beepool.bat but you can technically overwrite any of the batch files in the folder with the appropriate code configuration, or even create a new one.
We recommend using SERO’s official pool, as it has the highest network hashrate and will thus deliver the most consistent rewards. If you’d prefer to use a different pool you can find a list of Super Zero pools here. There are currently only three, with two making up nearly 100% of total network hashrate. If you opt for one of the other two simply replace the pool address; the rest of the code will remain the same.
Your address can be found in the wallet program. Log into your account and on the right side of the screen click Copy Public Address.
Open the .bat file in any text editor and copy and format the following code:
t-rex.exe -a progpow --coin sero -o stratum+tcp://pool2.sero.cash:8808 -u <Wallet Address> -p <Password> -w <WorkerName>
pause
The finished product should look something like this:
t-rex.exe -a progpow --coin sero -o stratum+tcp://pool2.sero.cash:8808 -u 4AYppwnuiHAq6xieq5cW9rHdNJs1tvA539XmLPco2eMB8WFMedg9KZxSA6gpKyss8JDtvZfgiEp2rTtLVPqvpcMh -p x -w RTX3080
pause
Save and close the batch file and double click it to run it. The command line will open with a screen similar to this one:

At last, you’re mining Super Zero. Congratulations!
How to Sell SuperZero
Eventually you may want to liquidate your SERO balance or convert it to another currency to hold. There are a few steps to this process, which we’ll cover below.
First, you’ll need to send your balance to an exchange. Gate.io is by far the best option, as it makes up nearly 100% of all SERO trading volume and is by far the most reliable option. Sign up with our link to save 10% of trading fees.
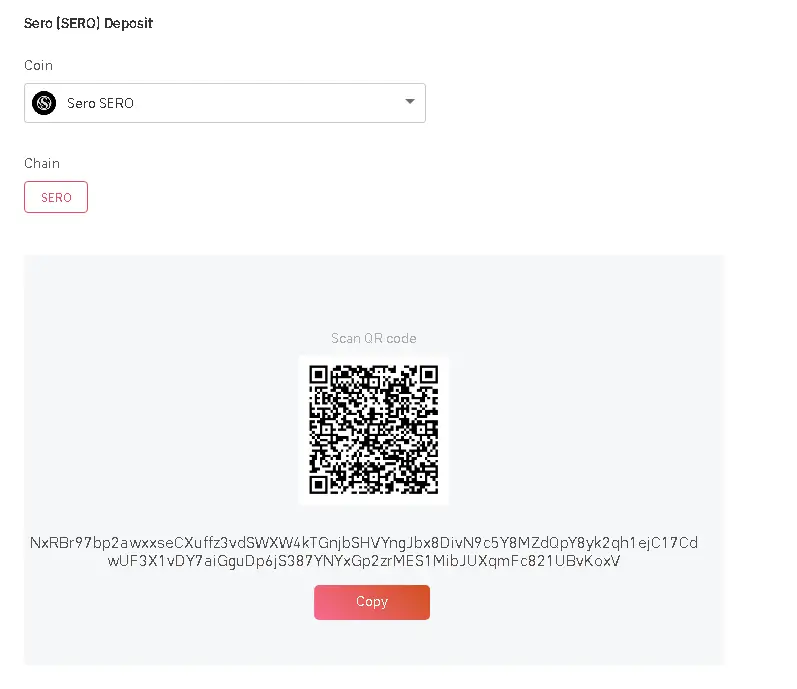
Head to Gate’s SERO Deposit Page and wait for a deposit address to be assigned to you. This may take 30 seconds or so. Once your address is assigned copy it and head over to your SERO Wallet.
In the wallet select Send and paste the deposit address into the To slot. Fill out the amount or check the Send Everything box, specify your preferred gas fee (more gas results in quicker transactions), and hit Send. Give the transaction a few minutes to go through; your SERO balance will show up on Gate shortly.
When your Super Zero balance shows up in your Gate wallet find the SERO/USDT trading pair. Gate also support SERO/ETH, but we recommend converting your SERO to Tether since this gives you access to the cheapest withdrawal fees. Place a limit order and wait for it to go through.
Once your entire SERO balance has been converted to Tether you can withdraw your stablecoins to a CEX like Crypto.com or Binance.US by navigating to Wallet > Withdraw and filling out all parameters.
We recommend withdrawing on the Solana blockchain to Crypto.com, since this allows for the lowest $5 withdrawal fee. Binance.US doesn’t support Solana, so you’ll have to pay slightly more (currently $6.70) to transfer via BSC.
Fill out all required information and hit Submit Request. The sent USDT should appear in your Binance or Crypto.com wallets within several minutes. From here it can be withdrawn as fiat, converted to another cryptocurrency, or staked for a decent APR.
Art of PC is reader-supported. We may earn a commission if you make a purchase through our affiliate links. Thanks for your support!