What is BitCash?
BitCash is, as its name suggests, a fork of the far more famous Bitcoin. Not to be confused with Bitcoin Cash (BCH), it’s a GPU-mineable coin on the X25X algorithm with an absolutely microscopic market cap ($51,000 at the time of writing). It’s also one of the most profitable cryptocurrencies to mine; at the moment it’s ranking behind only Ethereum and Super Zero on most GPUs.
What separates BitCash from other similar cryptocurrencies is its proposed mission: to be a sort of decentralized banking protocol. As such, BITC supports transfers using Twitter, Instagram, and Twitch handles, allowing users to send crypto to people who don’t have a BitCash wallet.
BitCash also has a feature similar to Ethereum Name Service whereby users can send crypto using account nicknames rather than addresses. Extremely low gas fees and fast block times make BITC a more efficient means of transfer.
Truth be told, though, all of these features have been seen before in other projects and don’t necessarily make BitCash all that unique. What does, though, is its incredibly-easy mining interface. Whereas mining cryptocurrency usually takes at least a little technical expertise to get started (like writing a batch script), BitCash is incredibly easy to mine.
Combined with its current profitability and high upside, we’d say this is currently the best cryptocurrency to mine as a beginner.
See Also: How to Mine Cryptocurrency: The Essential Guide
How to Mine BitCash the Easy Way (CPU-Mining)
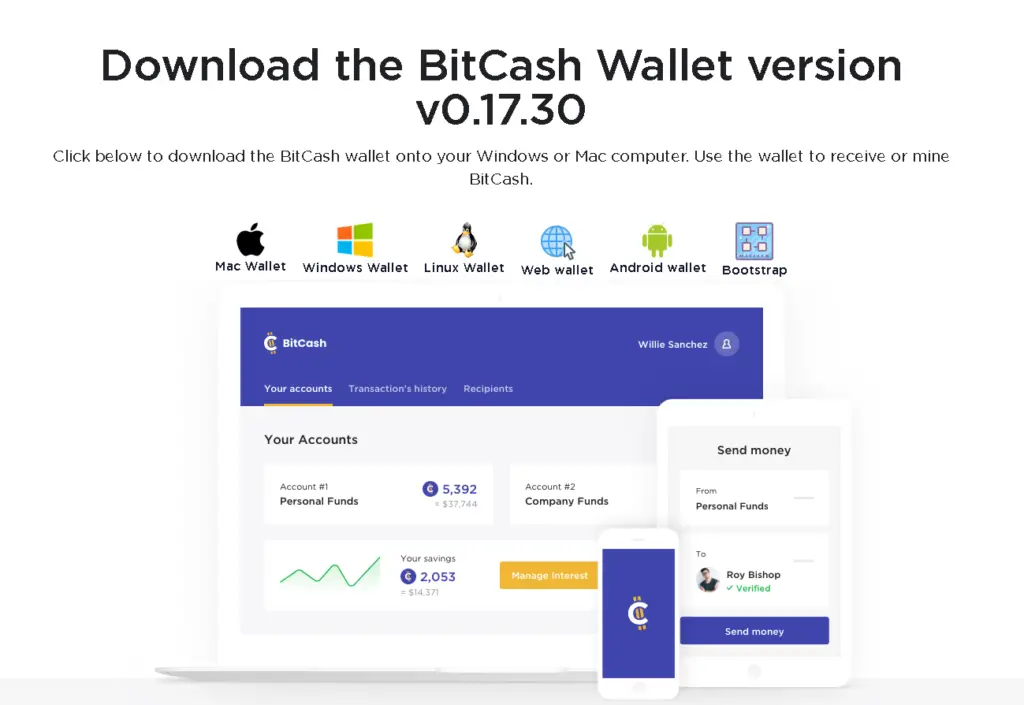
As previously mentioned, mining BitCash is incredibly easy. To get started, head to their wallet download page. Select your operating system from the list of options and save the file to your Downloads folder or any other preferred location; this will initiate the wallet’s download.
Once downloaded, run the bitcash-setup.exe file to start the installation wizard. Follow the prompts (keep clicking next) until a window opens asking if you want to download and install the bootstrap files. Select Yes; this will save you a lot of time by allowing you to sync to BitCash’s blockchain far more quickly. The download may take a little while.
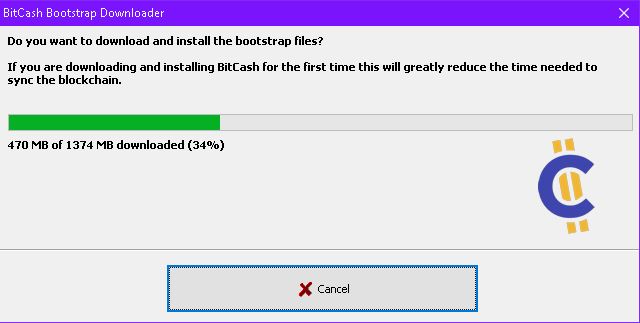
When the download is finished, go with the default option (save to the appdata folder) and continue. You’ve successfully downloaded the BitCash software.
Run the program and it will open to a UI like the one shown below. Allow time for your wallet to synchronize with the BitCash blockchain. Since you’re catching up on four years worth of transactions, it may take a while.
When your headers are all synced up, navigate to the Mining tab. Click Start Mining and just like that, you’re mining BitCash, no batch file configuration required. If you win a block the balance will automatically be deposited to your wallet. If you ever need to pause mining, just select Stop Mining on the same page.
How to GPU-Mine BitCash
For more substantial profits you should consider GPU-mining BitCash. It’s not quite as easy to set up as using the BitCash desktop interface, but you’ll be able to take advantage of your graphics card’s more potent hashing power.
First off, download WildRig Multi. It’s one of the only miners that supports the X25X hashing algorithm (which BitCash utilizes). Download the latest version that’s compatible with your OS. Once downloaded, extract the files to a folder on your desktop or other location of preference.
In the folder, find the file named start-sin.bat. Right-click on this file and select Edit.
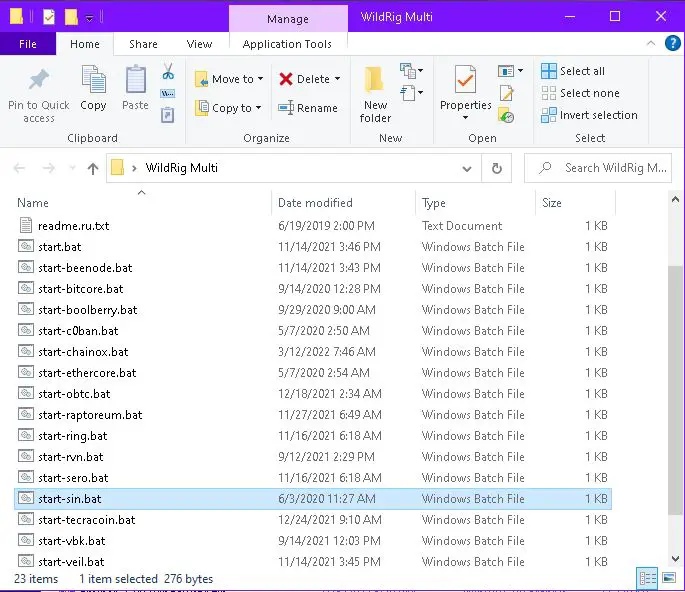
In the text editor that opens, you’ll need to alter several parameters to fit your specific use-case. Following :loop, you’ll see a line that looks like this:
wildrig.exe --print-full --algo x25x --url stratum+tcp://eupool.sinovate.io:3253 --user SauLQKggrWaAcFU8BvZCJ2bEHAYb8QdpQY --pass c=SINThis is the only line that needs adjustment. Substitute your pool URL, pool port, and wallet address as follows:
wildrig.exe --print-full --algo x25x --url stratum+tcp://<POOL URL>:<PORT> --user <WALLET ADDRESS> --pass <PASSWORD>You can also change the password if your pool uses one. If you don’t know what pool to use, we recommend BSOD. They’re the largest operational BitCash pool, so you’ll get the most consistent rewards possible. They charge a reasonable 0.9% pool fee and pay out every 2 hours. The pool URL for BSOD is pool.bsod.pw and the port is 2564. Get your wallet address from the BitCash desktop application under Receive.
Our finalized batch file ended up looking like this:
@echo off

:loop
wildrig.exe --print-full --algo x25x --url stratum+tcp://pool.bsod.pw:2564 --user b2TgK5MEpJarsiriE6F63jXMA8dw1epdqHTZEiyGwZr8Xser1DZB --pass x

if ERRORLEVEL 1000 goto custom
timeout /t 5
goto loop

:custom
echo Custom command here
timeout /t 5
goto loop
Once your batch file is entirely configured save it and double click it to run. When you see a screen like the one below, you’re up and mining.
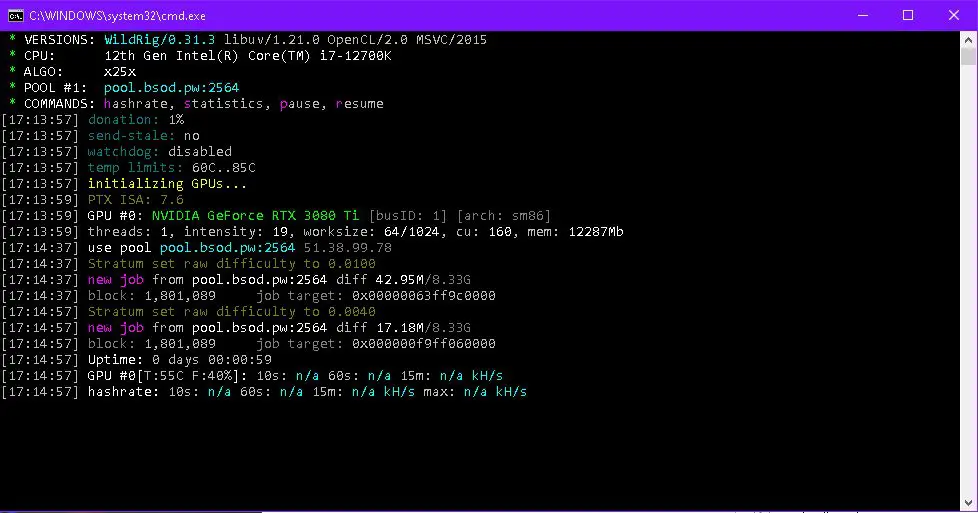
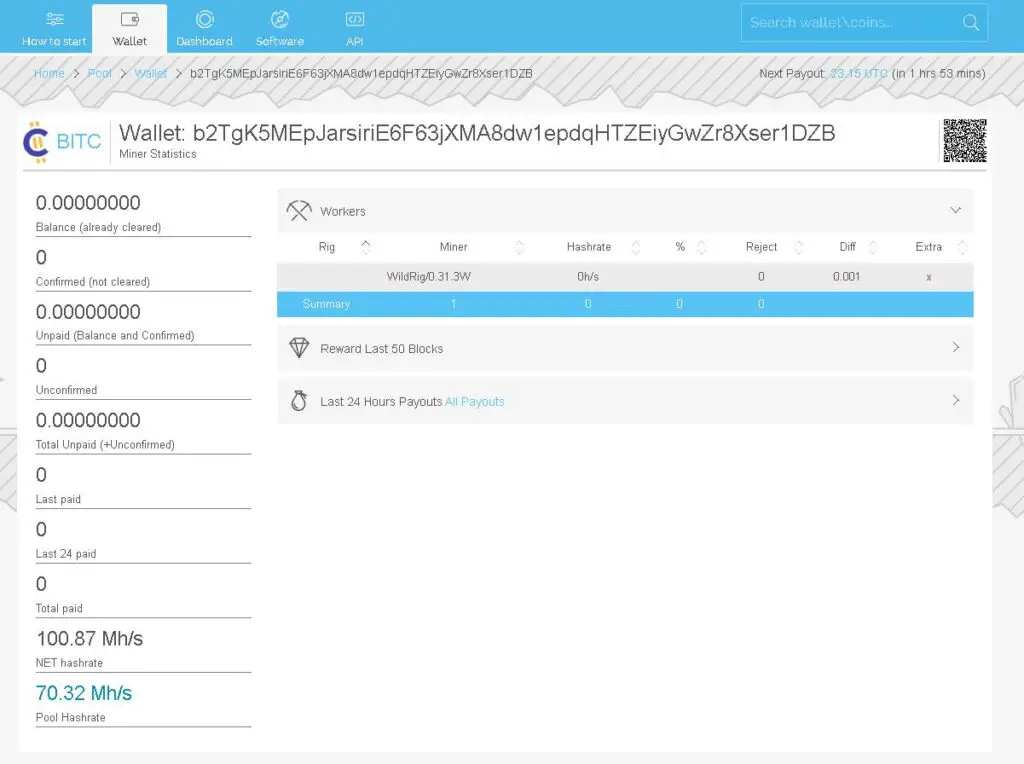
To view hashrate and reward statistics simply go to BSOD’s Wallet page and paste in your address. Within 15 minutes or so of starting your miner, your statistics and unpaid balance should appear here.
How to Sell BitCash
At first you might be alarmed to see that liquidity for BitCash is ridiculously low. The 24-hour transaction volume listed on CoinMarketCap is less than $100.
This is because most of BITC’s liquidity lies on the Binance Smart Chain in PancakeSwap and trades as Wrapped BitCash (WBITC), which isn’t listed on CoinMarketcCap.
Liquidity isn’t incredible (the WBITC/WBNB pool currently has 7.26K worth of tokens), but it’s good enough for small-scale miners; you can sell $30 of WBITC at less than 1% slippage. Here’s how to sell your BitCash on PancakeSwap:
Wrap Your BitCash
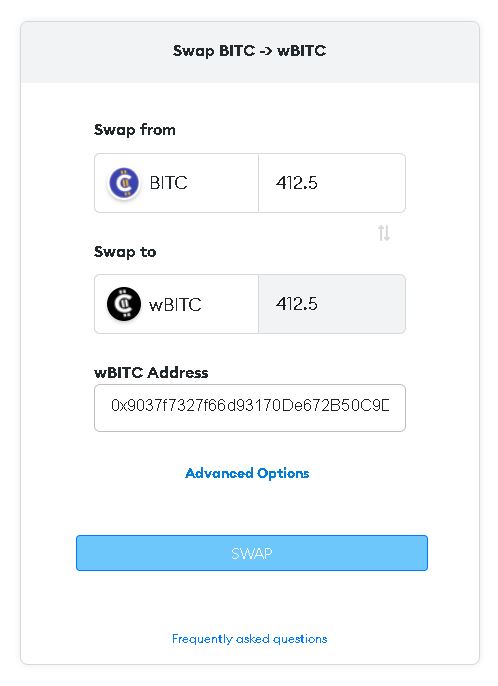
Before you can sell BITC, you have to convert it to WBITC (the Binance Smart Chain version of the asset). To do this, head to BitCash’s wrapping page and input your Binance Smart Chain address (this is where the WBITC will be deposited). If you want, toggle Advanced Options and fill in your email address to receive a confirmation email when the transaction is complete.
If you don’t have a BSC wallet, set one up in MetaMask or your non-custodial wallet of choice. Finally, hit Swap.
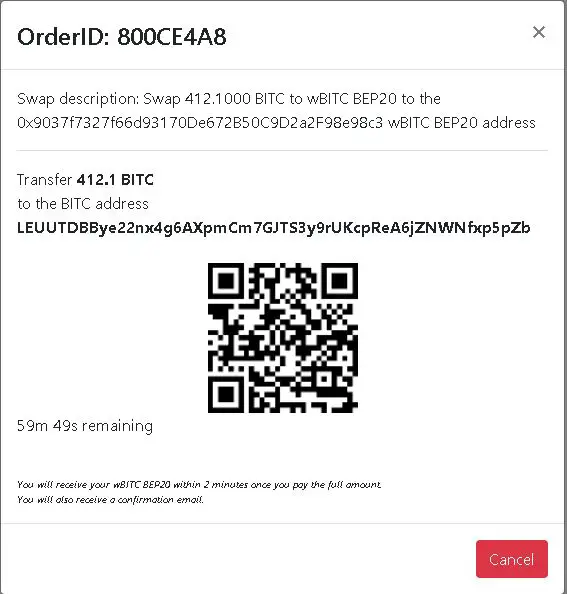
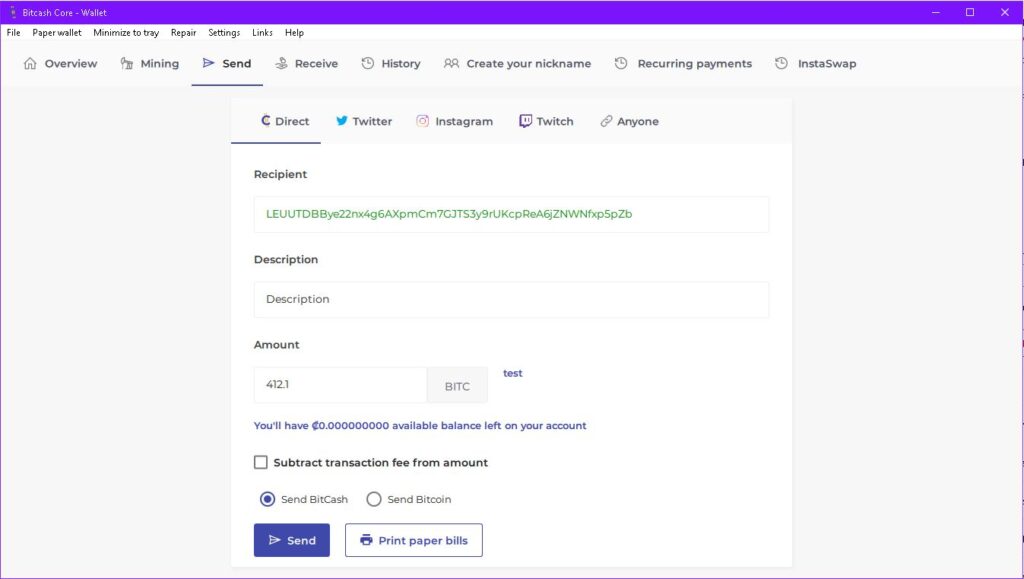
A window will pop up prompting you to send BITC to a specific address. Copy the address and send the exact amount specified to that address via your BitCash wallet. To do this, click Send (in the wallet interface), paste the address under Recipient, and specify the amount.
In the example below I’d send 412.1 BITC to the address LEUUTDBBye22nx4g6AXpmCm7GJTS3y9rUKcpReA6jZNWNfxp5pZb.
In the wallet UI it would look like this:
Swap wBITC on PancakeSwap
Within two minutes of sending the BITC, an equal balance of wBITC will show up in your BSC wallet. Head over to PancakeSwap and paste in wBITC’s token address to exchange it for other cryptocurrencies:
0x44969fdFEeAb1D7F6E500a5A8f1AEeBd74785AefAlternatively, use this link to automatically pull up the wBITC swap page. You may be prompted to confirm that you want to import the token; do so.
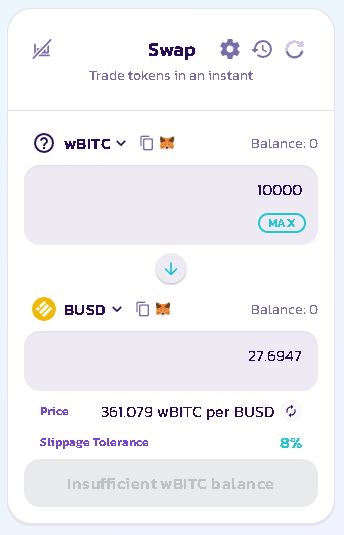
From here, you can swap your wBITC for any BSC token. If you’re looking to cash out immediately, your best bet is to swap to BNB. This way you’ll be able to deposit it directly to Crypto.com or Binance and swap for fiat.
It’s best to allow your BITC or wBITC balance to accumulate to a sizeable amount before converting it to another cryptocurrency, since you’ll have to pay gas fees in BNB for each swap. The fewer transactions you make, the more profit you’ll keep.
Art of PC is reader-supported. If you make a purchase through one of our affiliate links, we may earn a commission. Thanks for your support!
