Solid state drives have been around for so long that just about anyone who’s loosely involved in PC-building circles knows to use one. They’re a lot faster and prices per gigabyte come down every year like clockwork.
But not all SSDs are created equal. SATA SSDs only support speeds up to 600 MB/s. This pales in comparison to modern-day NVMe (non-volatile memory express) SSDs, some of which have blazing fast read speeds upwards of 7000 MB/s.
What is M.2?
M.2 is a form-factor, or design, that’s very commonly used for consumer NVMe drives. The most common dimensions for an M.2 drive are 22mm by 80mm, abbreviated as 2280.

While many people use the terms “M.2” and “NVMe” interchangeably, this is not accurate on the most technical level. Some M.2 drives have a SATA connection, and some non-M.2 drives feature NVMe protocol.
As a general rule of thumb, though, consumer NVMe SSDs are almost always M.2 form-factor, and M.2 SATA SSDs are not very common.
How to install an M.2 NVMe SSD:
Make sure your PC supports M.2 drives
Before you even order an M.2 SSD, it’s important to make sure your computer supports it. Most newer motherboards will have at least one M.2 slot, but if you have an older model or a base-level motherboard you may need to buy a PCIe-to-M.2 adapter, which you can plug into any PCIe x4, x8, or x16 slot in your motherboard.
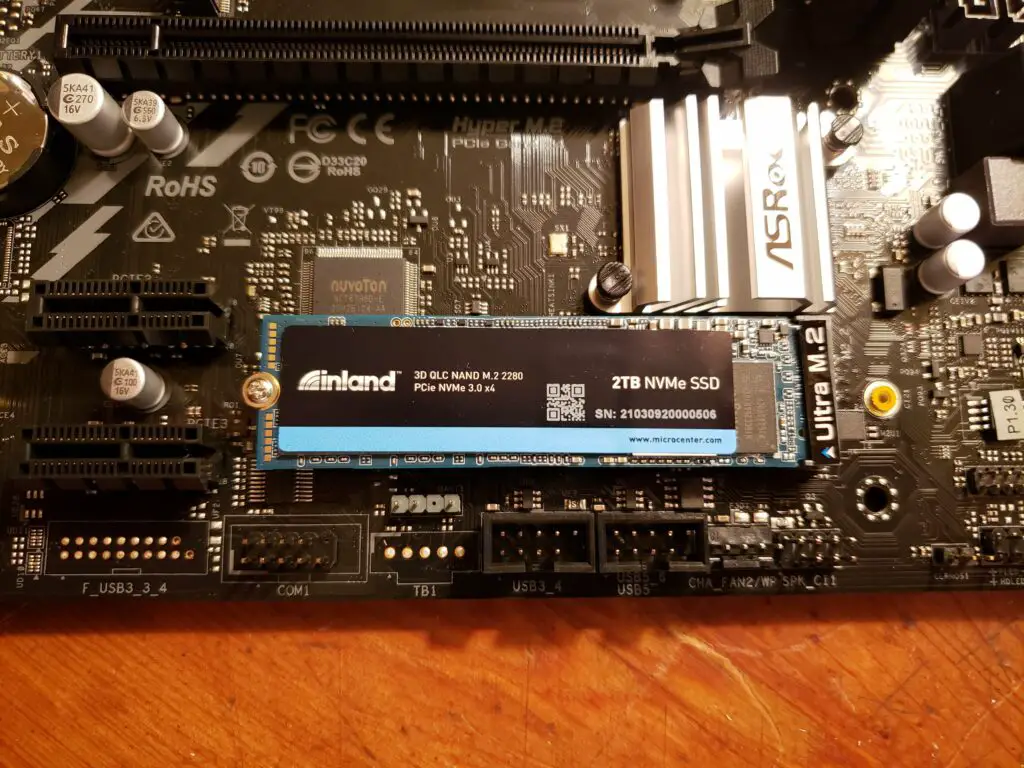
Shown below is a picture of a motherboard’s M.2 slot for reference.

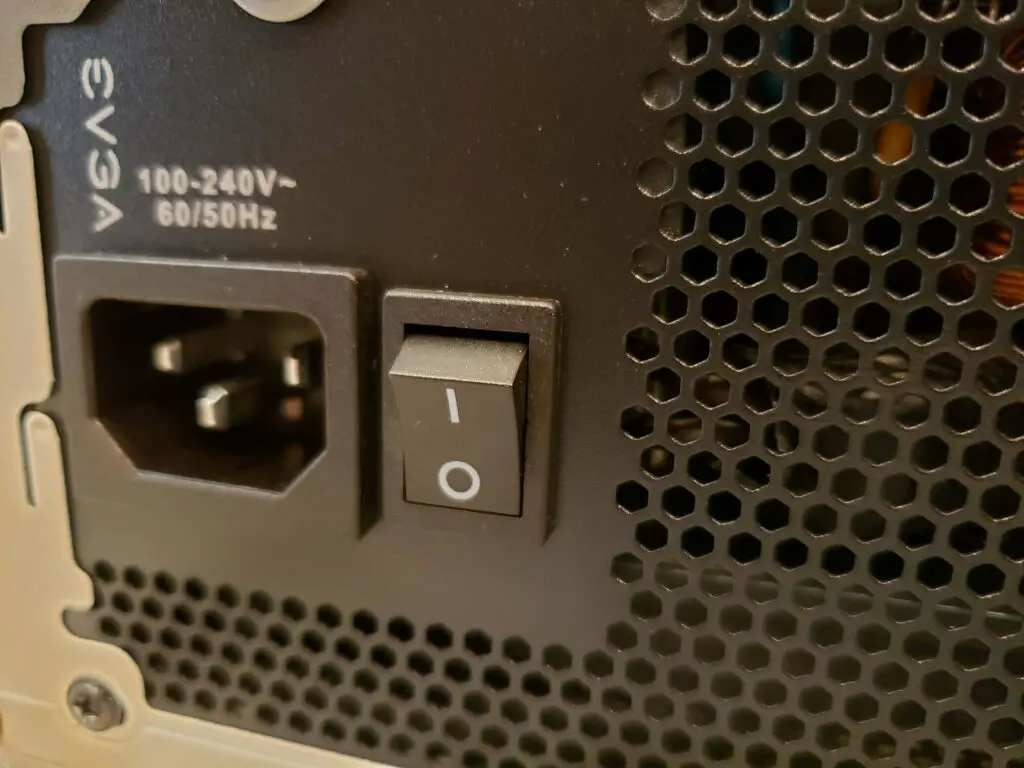
Power down your PC
Most NVMe drives aren’t hot-swappable, meaning you’ll need to cut the power to your computer during installation. Just to be safe, we’d recommend switching off the power supply and/or unplugging the power supply at the wall to ensure that all power is cut off.
Insert the M.2 drive at a 30-degree angle
You’ll see a notch in the end of your M.2 drive. Make sure this is lined up with the groove in the M.2 slot.
Holding the drive at a 30-degree angle from the motherboard, gently slide it into the slot. It shouldn’t take much force, so be gentle.

Once it’s been pushed fully into the slot, the drive should look like this:

Note how the gold end of the drive is no longer visible. This is how you can tell it’s correctly seated in the slot.
Secure the drive with a screw
The motherboard (or adapter, if you’re using one) should come with an individually packaged single screw. Push the M.2 drive downwards so that it lies parallel to the motherboard. Use the screw to secure the drive to the motherboard, and you’re done installing your new SSD!
Conclusion:
If you’re not sure whether or not you need an M.2 SSD, we highly recommend one. Newer NVMes are six to twelve times faster than a SATA SSD, which translates to significantly faster boot and file transfer speeds.
If you’re not sure where to start, check our our picks of the best NVMe drives for everyday use.
If you’re interested in doing more than just installing an M.2 SSD, check out our guide to building a PC for a comprehensive guide to the entire process.
ArtofPC is reader-supported. We may earn a commission if you make a purchase through our affiliate links. Thanks for your support!