You’ve probably been there before: You’re in the middle of an intense gunfight, when suddenly something is terribly wrong. Your reticle flies back and forth across the screen at double speed as you proceed to whiff all fifty shots from your high-capacity SMG, and then you die.
What went wrong? Odds are, in your button-mashing zeal you accidentally clicked your DPI button, effectively doubling (or halving, depending on your mouse’s configuration) your sensitivity. Since you’re reading this article, it’s likely that you’ve experienced a scenario similar to this one very recently, and are trying to figure out how to disable your DPI button once and for all.
Fortunately, you’ve come to the right place! Whether your mouse is name-brand or purchased from a sketchy Amazon seller for $5, odds are you can easily disable your DPI by following the steps in this guide.
Today’s Deals
- 55% OFF: Nextorage 2TB NVMe SSD 7300MB/s Write 6900 MB/s Read |
$249.99$109.99 - STGAubron ABR0522 Tower with GTX 1660 Super and Core i3-10100F |
$550$495 - HP Victus 15L with RTX 3060 and Core i7-12700F
- Ryzen 9 5900X 12-Core, 24-Thread CPU |
$550$349.99 - ABS Stratos Aqua with Core i5-13400F, RTX 4060 Ti, 16GB DDR5 |
$1499.99$1199.99
What is DPI (in regards to computer mice)?
DPI is short for dots per inch, and is a metric used to determine how far your cursor will move on-screen, based on the distance you move your mouse. While most mouse manufacturers advertise a “DPI”, the technically correct terminology is CPI, or counts per inch. Thus, you’ll see these terms used interchangeably in some customization softwares.
If your mouse has its DPI set at 400, every time you move your mouse an inch on your desk your computer will register 400 “counts.” Software then translates this value into on-screen movement. If, for every count, your cursor moved half a pixel, it would move 200 pixels to the right if you moved your mouse an inch to the right.
Now, say you doubled your DPI to 800. For every inch you move your mouse on your desk, the cursor will move twice as far as it had before. At 1600, it will be twice as responsive as at 800, and so on. DPI has a linear relationship with mouse movement, so anytime you double your DPI your cursor will move twice as fast, and anytime you halve it the cursor will move half as fast.
It’s important to note that mouse movement is only linear if you have mouse acceleration disabled, which is not the case by default. Read our guide to disabling mouse acceleration on Windows 10 to learn how.
|
Best Value Mouse
|
Best Wireless Mouse
|
Best Lightweight Mouse

|
|
$59.99
|
$94.99
|
$44.98
|
Is High or Low DPI Better?
A commonly asked question is whether high or low DPI is preferable. To a certain degree this boils down to personal preference, but there are pros and cons to both.
High DPI
High DPI allows you to move your cursor easily with minimal arm movement. Controlling a high-DPI mouse requires a lot of precision in the wrist, rather than the arm. This ease of movement is especially useful if you’re low on desk space or have a small mousepad. You can navigate the full width and height of your screen without sliding off the mousepad.
Having a high DPI can also be useful in games, as it allows you to turn around quickly. In most cases, however, the tradeoff between precision and speed isn’t worth it. Your aim will likely suffer significantly. Also note that most titles allow sensitivity adjustment in-game, so even with a low DPI you could still have a high effective sensitivity by ratcheting up the in-game mouse sensitivity settings.
Low DPI
Low DPI, on the other hand, requires far more arm movement. This can sometimes be a pain, as your mouse may slide off the pad if you don’t have an abundance of elbow room. On the other hand, low DPI is a lot more precise. Since the cursor moves slow in comparison to higher DPIs, it’s a lot easier to land in the exact location you were aiming for, on the first try.
What’s the Best Mouse DPI?
In the end, your choice of DPI will depend on your skillset and preferences. Some users can achieve extreme precision, even with a high mouse sensitivity. Most can’t, though, so steering towards the lower end may be the better choice unless you’re a Kovaak’s whiz.
Keep in mind, too, that your choice of DPI should be based solely on what you want your mouse sensitivity to be outside of games. You can always adjust your in-game sensitivity to be lower or higher, without changing your DPI settings.
As for the best mouse DPI, 800 DPI is what we’d choose if we had to pick just one. It represents a happy medium; even folks with smaller-than-average mousepads will be able to move across their entire screen without falling off the edge, but sensitivity is low enough to offer great precision. 400 DPI is our second-place choice. If we had to guess, around 95% of mouse owners utilize one of these two DPI settings.
How to Disable Your Mouse’s DPI Button
Disabling your mouse’s DPI button is simple. Just follow these steps:
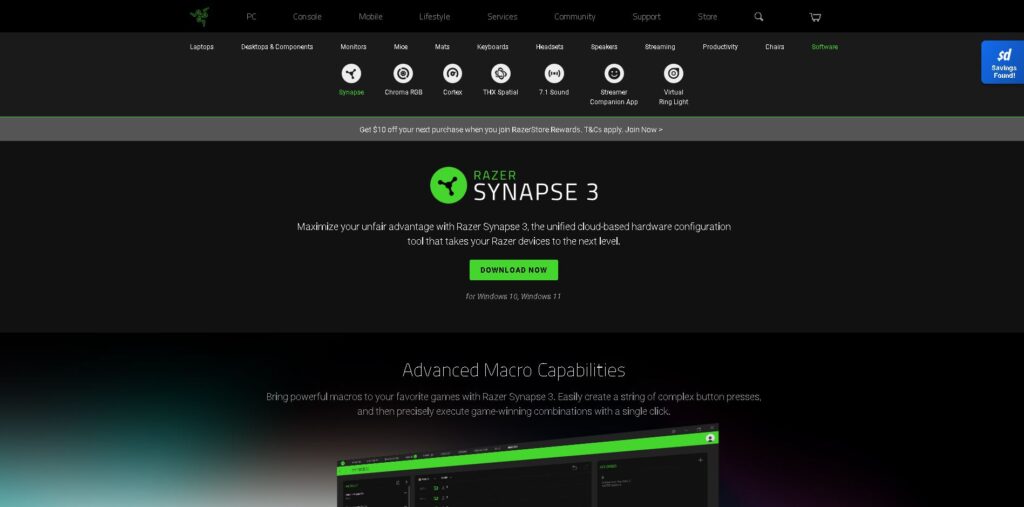
1. Download your mouse’s customization software
Essentially every major brand of mouse comes complete with customization software. These desktop applications allow you to adjust a number of settings such as RGB lighting (if applicable), button mappings, and, of course, DPI.
You’ll need to install the software that corresponds with your mouse. Most companies only support their own mice so, for instance, you couldn’t use Logitech G Hub with a Razer mouse. Google <brand> mouse software (e.g. Razer mouse software), and your should come up. If this fails, try <mouse model> mouse software (e.g. Glorious Model D mouse software).
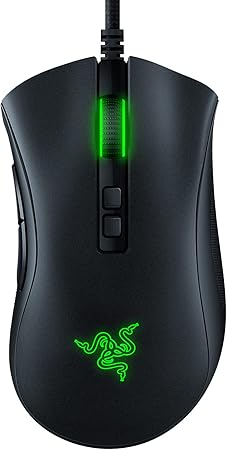
In this instance we’re using a Razer DeathAdder V2, so we installed Razer Synapse.
2. Find your mouse’s customization page
Once the program is installed, run it. The software may take a minute to open and register all of your connected devices the first time around. Once it’s running, you’ll likely see a home screen similar to the one shown below.
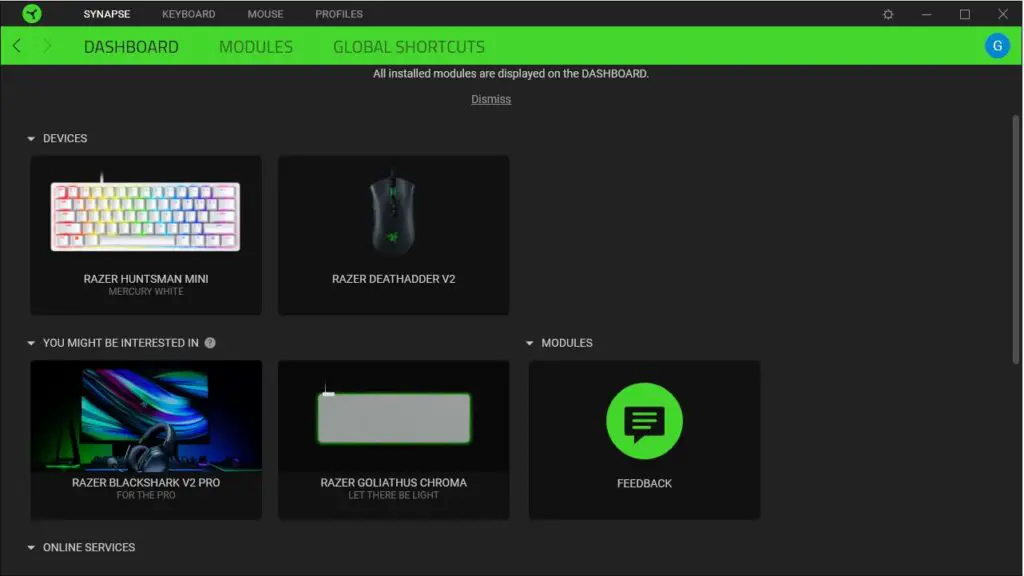
From here, select your mouse. In the above instance, we clicked on Razer DeathAdder V2.
3. Find your mouse’s DPI-specific page
This step may or may not be necessary; in some customization programs you’ll be taken straight to the DPI customization page after step 2.
For those who aren’t, a bit more digging is requisite. Browse through the various pages until you find the one with your mouse’s DPI settings. In Razer Synapse, this is found under the Performance tab.
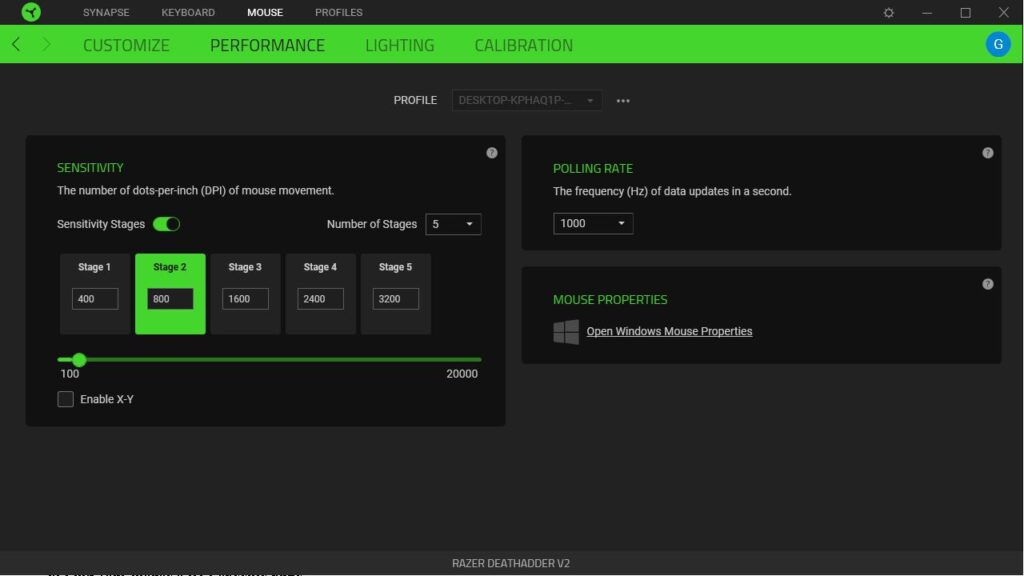
Most mice have, by default, a setup of sensitivity stages like the ones shown above. As you click your DPI button (or if you have two, click up and down), you move through these preset stages. To disable your DPI button(s), all you need to do is adjust your settings so that there are no stages. When this is done, clicking your DPI button won’t change anything.
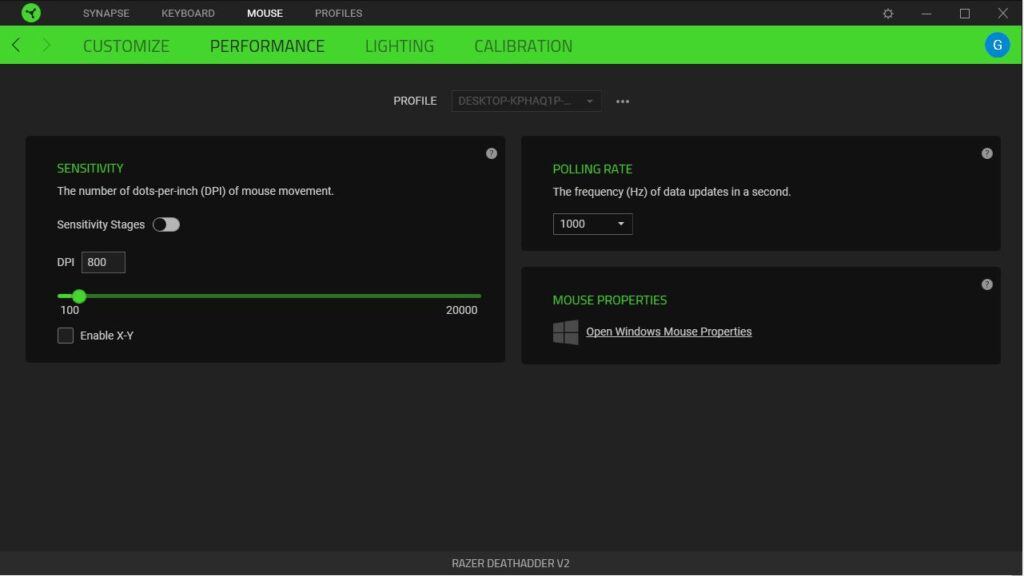
4. Disable sensitivity stages
If your mouse’s software has a button to disable sensitivity stages, simply toggle this and your problem is solved. With less advanced programs you may have to get a bit creative: Just set every sensitivity stage to your desired DPI. Thus, even if you accidentally click your DPI button and change stages, your mouse’s DPI will remain the same.
That’s it! If you’ve made it this far, your DPI button should be out of order until you wish it to be otherwise. Most mice store these preferences in onboard memory, so even if you move your mouse to another PC your DPI button should remain disabled. Enjoy your newfound ability to maintain a consistent sensitivity!